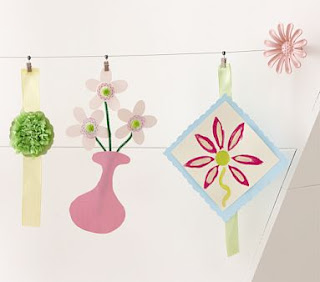
After my post yesterday, I decided to share what I do with all of my kids artwork.
I love to display my kids art. What mom doesn't? I save way too much of it and would love to leave their masterpieces up for months. I remember the day my daughter drew me her first picture in preschool. I called my sister in law who has 3 kids older than mine and squealed with delight.
My need to display my kids art and my need to keep my tiny kitchen tidy did not mesh. So, I decided that I really needed a way to proudly show off their hard work.
So, I did this. I think I saw it in a parenting magazine. I really can't remember because it's been years since I did it. But I can tell you that now you can buy a similar system in Pottery Barn Kids for $39.
If you feel crafty and don't want to spend that much money, here is what I did.
You will need:
- 2 decorative drawer pulls
- Screws with pointy ends on one end and flat on the other (you will be discarding the flat head screws that come with the drawer pulls). I did have to ask for help at the hardware store to find these.
- 1-3 feet of picture wire ( length will depend on your space)
- Some type of clips to hang the artwork. Clothes pins work fine, big office clips work great, too. I found the ones pictured below at the dollar store - 3 in a package. I also used some that I found in a random place at the hardware store - you can see those in some of the pictures. Use whatever you can find and fits your budget.
Step 1: Remove flat head screw from the drawer pull. Replace with pointy end screw - flat side into the pull and pointy side out so you can screw that into the wall.
( you can also keep the flat head screw and place an anchor of some sort into the wall and then place the screw into the anchor. I didn't see the need for that since there is never that much weight on it.)
Step 2: Find a large area of blank wall that you will display the art.
Step 3: Just screw the drawer pull right into the wall and leave a little space between the wall and the back of the draw pull so that you can wrap the picture wire around it.
Like this:
Step 4: Line up where you want your other pull to go at the end of the wall and screw that one in.
Step 5: Wrap the picture wire around the pull. Stretch to other drawer pull and do the same. Leave some slack but not too much.
Step 6. Hang art and Enjoy! Like this!
Now it serves as decor for the play room, it stays up for a very long time and we all get to enjoy it...out of the kitchen.
I also frame very special works of art for the playroom. It's a perfect way to decorate a room like that.
I don't remember how much I spent on it but depending on how much you spend on the drawer pulls and clips it can be pretty inexpensive. The picture wire comes in a package for a few bucks.
For more great Works For Me ideas head on over to We are THAT Family for Works For Me Wednesday.


8 comments:
Looks great. I do the same thing in our basement and also put my kids' artwork in frames. I have a frame (just the wood part) in our powder room that gets artwork taped in the middle of it and that rotates every week or so. The kids love seeing their work on display.
Love the decorative drawer pulls! IKEA has a similar system that pulls really tight (once you figure out how to hang in!) for about $3 - clips included. I have in my hallway and love it!
I like it!! I needed this idea 12 years ago...........boo hoo, not much art work coming home now.
Great idea! In our next house, I may do that. For now, I frame my favs and the rest go in a box - one for each kid.
Beautiful! I love it!! I might have to do that in my basement (aka playroom/arts and crafts room)
This is just what I was thinking about doing in Katies room, just haven't had the time! Thanks for the insperation!
Great idea! Can't wait to try this in my son's play room.
I had this same idea for our baby's nursery and couldn't figure out how to make it happen. I found your blog and we followed your instructions - it turned out FABULOUS! I wish I could send a photo!
Post a Comment